It's happened to all of us. You buy a regular T-shirt, take it home, and it turns out to be about 3 sizes too big. There's also the ones that are so unflattering you might as well be wearing a cardboard box. Am I right? Well, there's hope! All you need is:
- Sewing Machine
- Pins
- Thread
- Fabric Scissors
- Dressmaker's Tracing Paper (optional)
- A T-Shirt to alter
Ready to get started? It's quick, less than an hour. The process is also easy, it only takes the most basic of sewing skills.

This is the before. You can't even tell where my waist is! I forgot to take a full "before" pic, but this shirt was very baggy on me.
Step 1:
Put on the shirt inside out and put in a couple of pins (just one side is fine) where you want to take it in. I put 2 pins in. One pin went where my waist is, and therefore would be the smallest part of the shirt, and one where I could start going straight down. I then kind of "eyeballed" the rest of the pin placement when I took off the shirt.

The pins. Customize the curve to your body type. Notice I included the arm, because that was also too big.
Step 2:
Pin the curve (one side only is fine). If the shirt is the right size for your hips (like mine was) you still have to sew that part. You would just sew a small seam (about 1/4 inch) straight down from the bottom of the curve. Now try on the shirt and adjust the pins if needed.

Careful not to stick yourself with pins!
Step 3:
You're ready to start sewing! This is just a basic seam, and you don't have to follow the lines on your sewing machine, just follow the pins. Don't forget to reinforce the edges by back stitching a few times. Use a straight, long stitch.
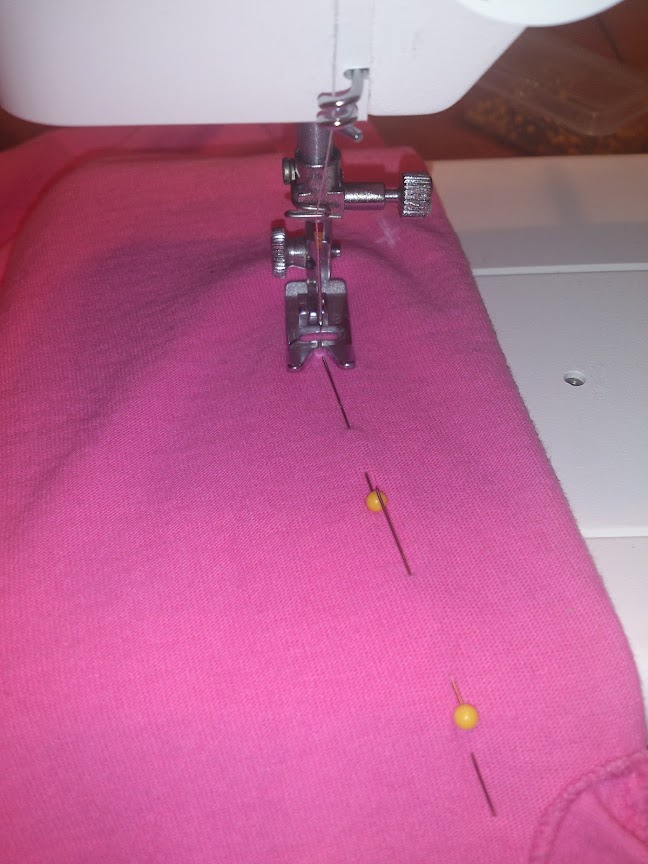

The top of this picture is the bottom of the shirt, where I stitched straight.

Pivot at the arm seam.
Step 4:
For the second side, you want it to be identical to the first side. There are several ways to copy the first side, including folding the shirt and pinning underneath the sewn part. However, the easiest method is dressmakers tracing paper.
Fold your shirt in half, place the paper (ink side down) in between the two layers. With a tracing wheel, go along your stitch line.

Press fairly hard. It doesn't leave any holes.

This is the trace line
Step 5:
Sew on the trace line
Step 6:
Try on the shirt one last time (inside out is best). You can make any adjustments if you need to.
Step 7:
Cut about 1/4 inch from your seams. You can serge the edges if you want, otherwise just leave them.

You're finished!

Wasn't that easy? Fits much better now.
0 comments:
Post a Comment
Please keep all comments family friendly.